How to Build Your Own Drone for $20: DIY School Project
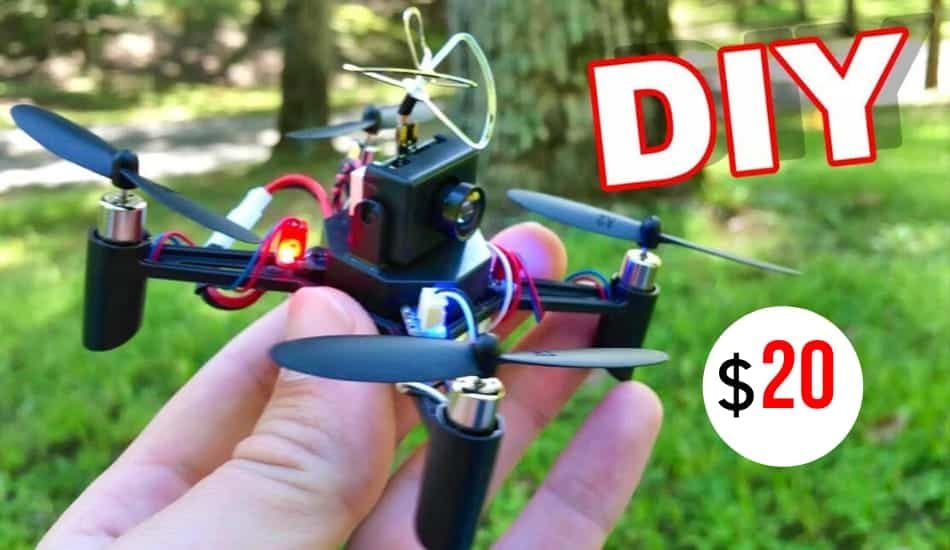
If you’re a drone fan and don’t want to spend too much money to own a drone, this article is recommended for you. Some people enjoy flying immediately by purchasing a commercial drone, while others want to enjoy building their own drone.
If you love making things, you can enjoy flying your own drone as part of your hobby. Moreover, even beginners can make their own drones with minimal knowledge. In addition, there is an advantage that you can reduce the cost by making your own drone for only around $20. You can complete a high-performance drone at a low price and make a drone of your choice according to your purpose, so you will have great satisfaction when you fly.
Many people who participate in drone racing make their own drones (of course that drones are more expensive, and cost much more then $ 20). Knowledge of your own work is useful because it often breaks due to a crash. This time, we will summarize the basic knowledge for making your own drone for school project or for your personal needs.
Benefits of Building Your Own Drone
One of the benefits of a self-made drone is that it costs less than anything else. With a self-made drone, you can get a drone at a cost of about $20, so it’s cheaper than a drone with a decent function.
In addition, there are many benefits to make your own, such as the ability to assemble a drone with your favorite parts and the ability to customize it according to the performance required of the drone. If you make it with your children or for a school project, you can also learn science, crafts, and programming. A self-made drone has many advantages, so it is highly recommended.
Basic Physics Behind How Drones Fly
First, we will summarize the basic principles of drone flight and how the drone performs direction change. Unless you understand these things, you may end up with just a combination of parts, and your drone never takes off.
1.1. Drone Flight Principle
The principle of a drone’s flight is that it uses a force called “lift” like an airplane. “Lift”is the force acting upward. The air is divided into the shape of the wings and is divided into “fast wind” and “slow wind”, resulting in the pressure difference generated.
The drone can fly by generating lift in the wings of the propeller by rotating the four propellers. Also, if all four propellers rotate in the same direction, the drone itself will rotate. This is a phenomenon called “anti-torque action“. In order to suppress this half-torque action, if the adjacent propellers are arranged to rotate in the opposite direction, only upward lift can be used.
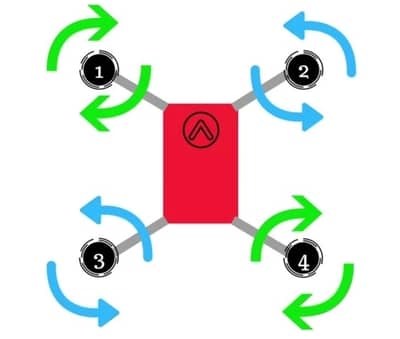
1.2. Drone Direction Change Principle
The drone changes direction by adjusting the lift with a propeller. By adjusting the rotation speed of each propeller, the direction of travel can be changed by controlling the lift generated in each propeller. Specifically, if the number of rotations of the front propeller is reduced and the rear is raised,
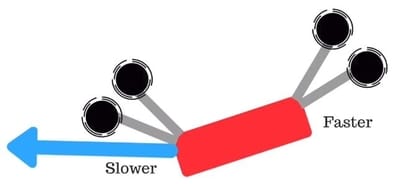
the lift of the rear propeller increases and the drone moves forward by taking a forward leaning posture. In this way, the aircraft is controlled by controlling the lift by adjusting the rotation speed of the propeller. These two are the basic drone flight principles. When you make your own drone, you should have knowledge of physics and mechanics.
How To Make DIY Drone
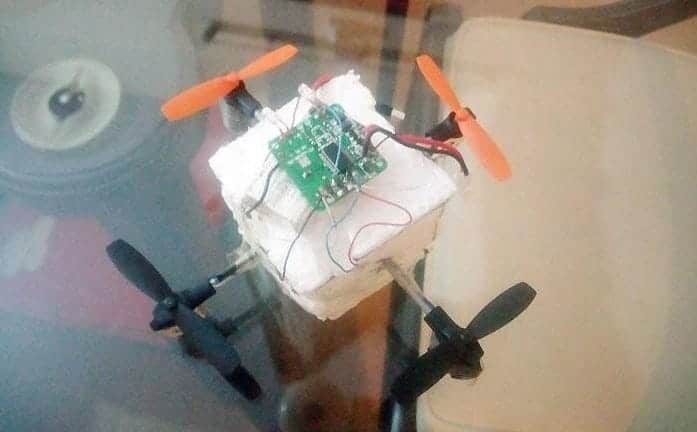
If you have the spirit of challenging electronic work with a budget of about $20, you can completely make a small so-called quadcopter. This eliminates the need to buy expensive drones. (Note: the price does not include remote control, only a drone) Before explaining how to make it immediately, here are a few things to keep in mind when flying a drone.
If you create a drone using the method introduced here, the weight of the drone will be less than 200g, which you will need to apply for. However, you can’t skip a drone anywhere even if you don’t need to apply (or if the application is accepted). Make sure you get permission to fly on someone else’s property. Also, the “Radio Law” is often overlooked. This article uses a 2.4GHz transceiver set that does not require a license or registration for drone operations, but be aware that a license or permission is required when using other radio bands.
For more information, here page please check from. Finally, don’t think that these small and light drones should do little damage. The fear of drone accidents is not only the impact due to the fall of the main body, but also the propeller that rotates at high speed may damage people and things, so when flying the drone, fly around carefully in the open place Let’s do it. Safety first! Let’s start with the equipment we will use.
– Baisc Equipment
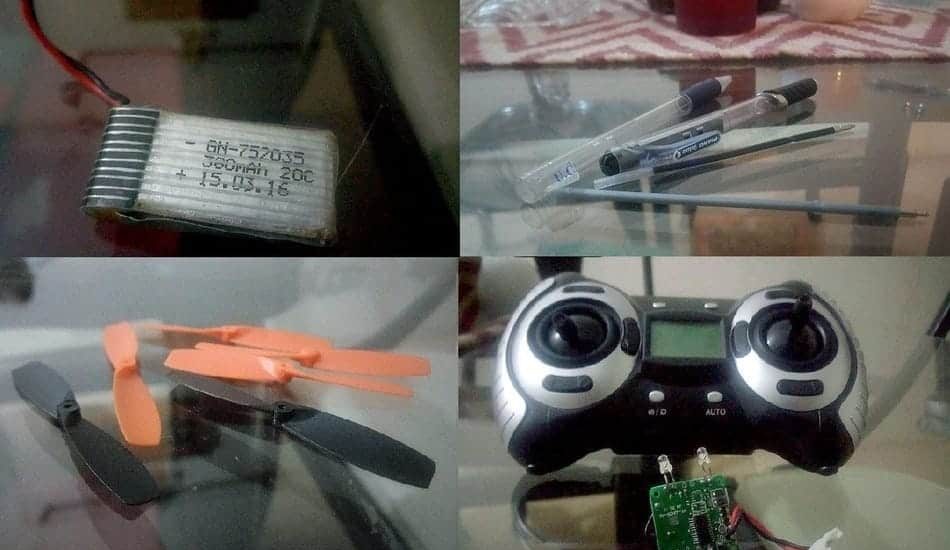
- Small motor x4: Sold at electronic parts specialty stores. Please select one with a rotation speed of 400-500 KV.
- Motor jacket x4: Used to fix the motor.
- Propeller x4: Recommended diameter is 10cm. When purchasing, make sure that it fits the motor shaft.
- Lithium Polymer (LiPo) battery: One 300V to 500mAh 25C 3.7V battery is enough for 10-15 minutes flight time.
- Battery charger: 3.7V battery charger. Can be purchased with a battery.
- 2.4GHz transceiver set: I used the HY-JJH36 board at home. If it is installed and connected to a motor, it can be operated from the transmitter (controller). If you don’t have affordable parts, you can operate the drone using a small flight controller and a compatible RC transmitter. The contents introduced in the link are already written with the firmware, but be aware that depending on the thing, you need to write the firmware yourself. However, drone control firmware such as Betaflight and Open Pilot can be written relatively simply by following the procedure, so you don’t have to write your own program. You can also use the Arduino for the flight controller, and you can move it as you like. Part 2 and later in this series will show you how to do this.
- Ballpoint pen lead x2: Used for quadcopter arm.
- Styrofoam: Place the circuit here.
- Tape, Glue gun
Related Article: Are Drones Allowed on School Grounds?
Step-by-Step Guide to Build Your Own Drone
Step 1: 4x Small Motor
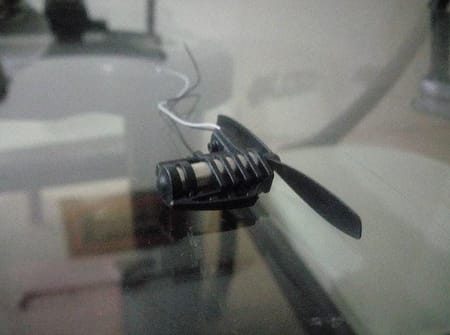
First you need to place the small motors in the pen cartridges. Check and make sure that they are well secured. Next, attach four propellers to each motor and also check that they are secured. Last, secure the propeller securely to the motor shaft so that it will not fail in later processes. You can move on to the next step if you have successfully done this.
Step 2: Motor-Board Connection
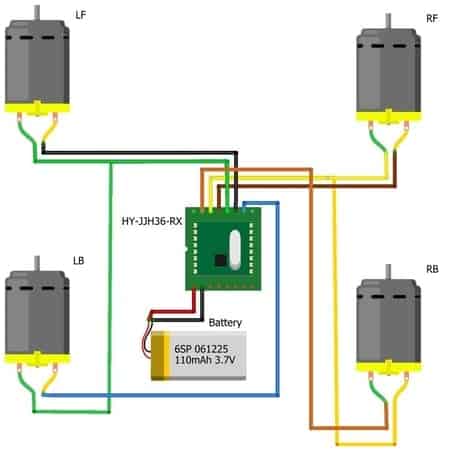
Attach 4 motors to the receiver board (in this case: HY-JJH36-RX). The wiring is as shown in the following wiring diagram, but since this is another package of Fritzing software, it should be read as follows.
➢ Motor RF (right front)
o Positive wire (motor side)-> RF + pin (RX board side)
o Negative wire (motor side)-> RF-pin (RX board
➢ Motor LF (front left)
o Positive wire (Motor side)-> LF + pin (RX board side)
o Minus wire (motor side)-> LF-pin (RX board)
➢ Motor LB (left rear)
o Positive wire (motor side)-> LF + pin (RX Board side)
o Minus wire (motor side)-> LB-pin (RX board side)
➢ Motor RB (right rear)
o Positive wire (motor side)-> RF + pin (RX board side)
o Minus wire (motor side) -> RB-pin (RX board side)
Step 3: Install Battery
Install the lipo battery (here, 380mAh, 25C, 3.7V) to the board as:
➢ Positive wire (battery side)-> Vin pin (RX side)
➢ Negative wire (battery side)-> GND pin (RX side)
Step 4: Get a Polystyrene Cube
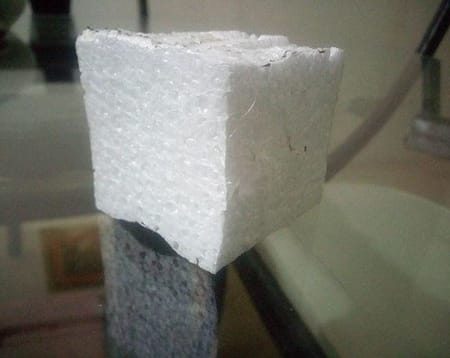
Try to get Polystyrene. Cut a cube of 5×5 cm on a side from the polystyrene foam. This will be enough for the drone to fly easily. If you want to enlarge the dimensions, feel free to try it, but don’t overdo it.
Step 5: Insert 2 Pen Cartidge
Insert two replacement cores (taken out of the ballpoint pen) so that both pass through the center of the polystyrene foam. Try to get the pen cartridges as accurately as possible through the center of the cube, for balance. This balance is essential when the engines are positioned and the drone balance maintained.
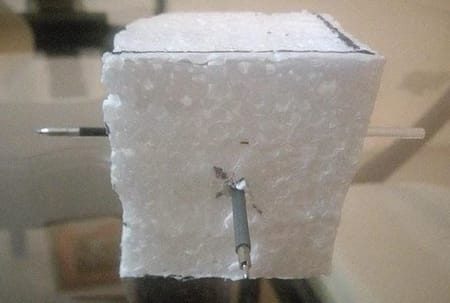
Step 6: Attach The Motors
Attach the motor to both ends of the ballpoint pen replacement lead and tighten the screw. Secure the replacement core with tape or glue. This is a very important process, because if you don’t do this well, your drone could fall apart in the air or lose its balance.
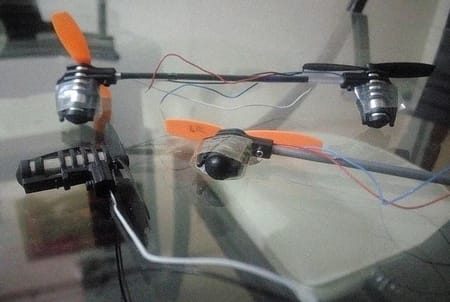
Step 7: Connect and Turn on The Drone
Place the battery on the polystyrene foam, place the HY-JJH36-RX board on it, and fix the whole with tape or glue. This is the end. You can skip at any time. The battery is connected to the circuit and the power is turned on so you can operate it with the controller.
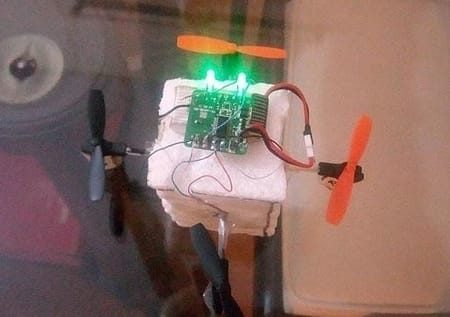
Attention and Summary
This is a low budget self-made drone, but if you actually skip it, it will be very difficult to balance and it will be difficult to control. To prepare for unexpected behavior, try to fly several times in a large area to see what happens. I want to make my own drone a little more!
This is the easiest way to make DIY drone within 30 minutes and for price of around $20. In the next article, I will show you how to put Arduino on a slightly more solid frame and incorporate it into your circuit as a flight controller. If you have any questions or would like to add, feel free to write in the comments below.

